Installation of Lyle Hendrick’s door locks
By Bill Schertz
Locks from From Lyle Hendricks - Hendricks Mfg. Inc.
www.HendricksMfg.com
(designed by Vance Jaqua)
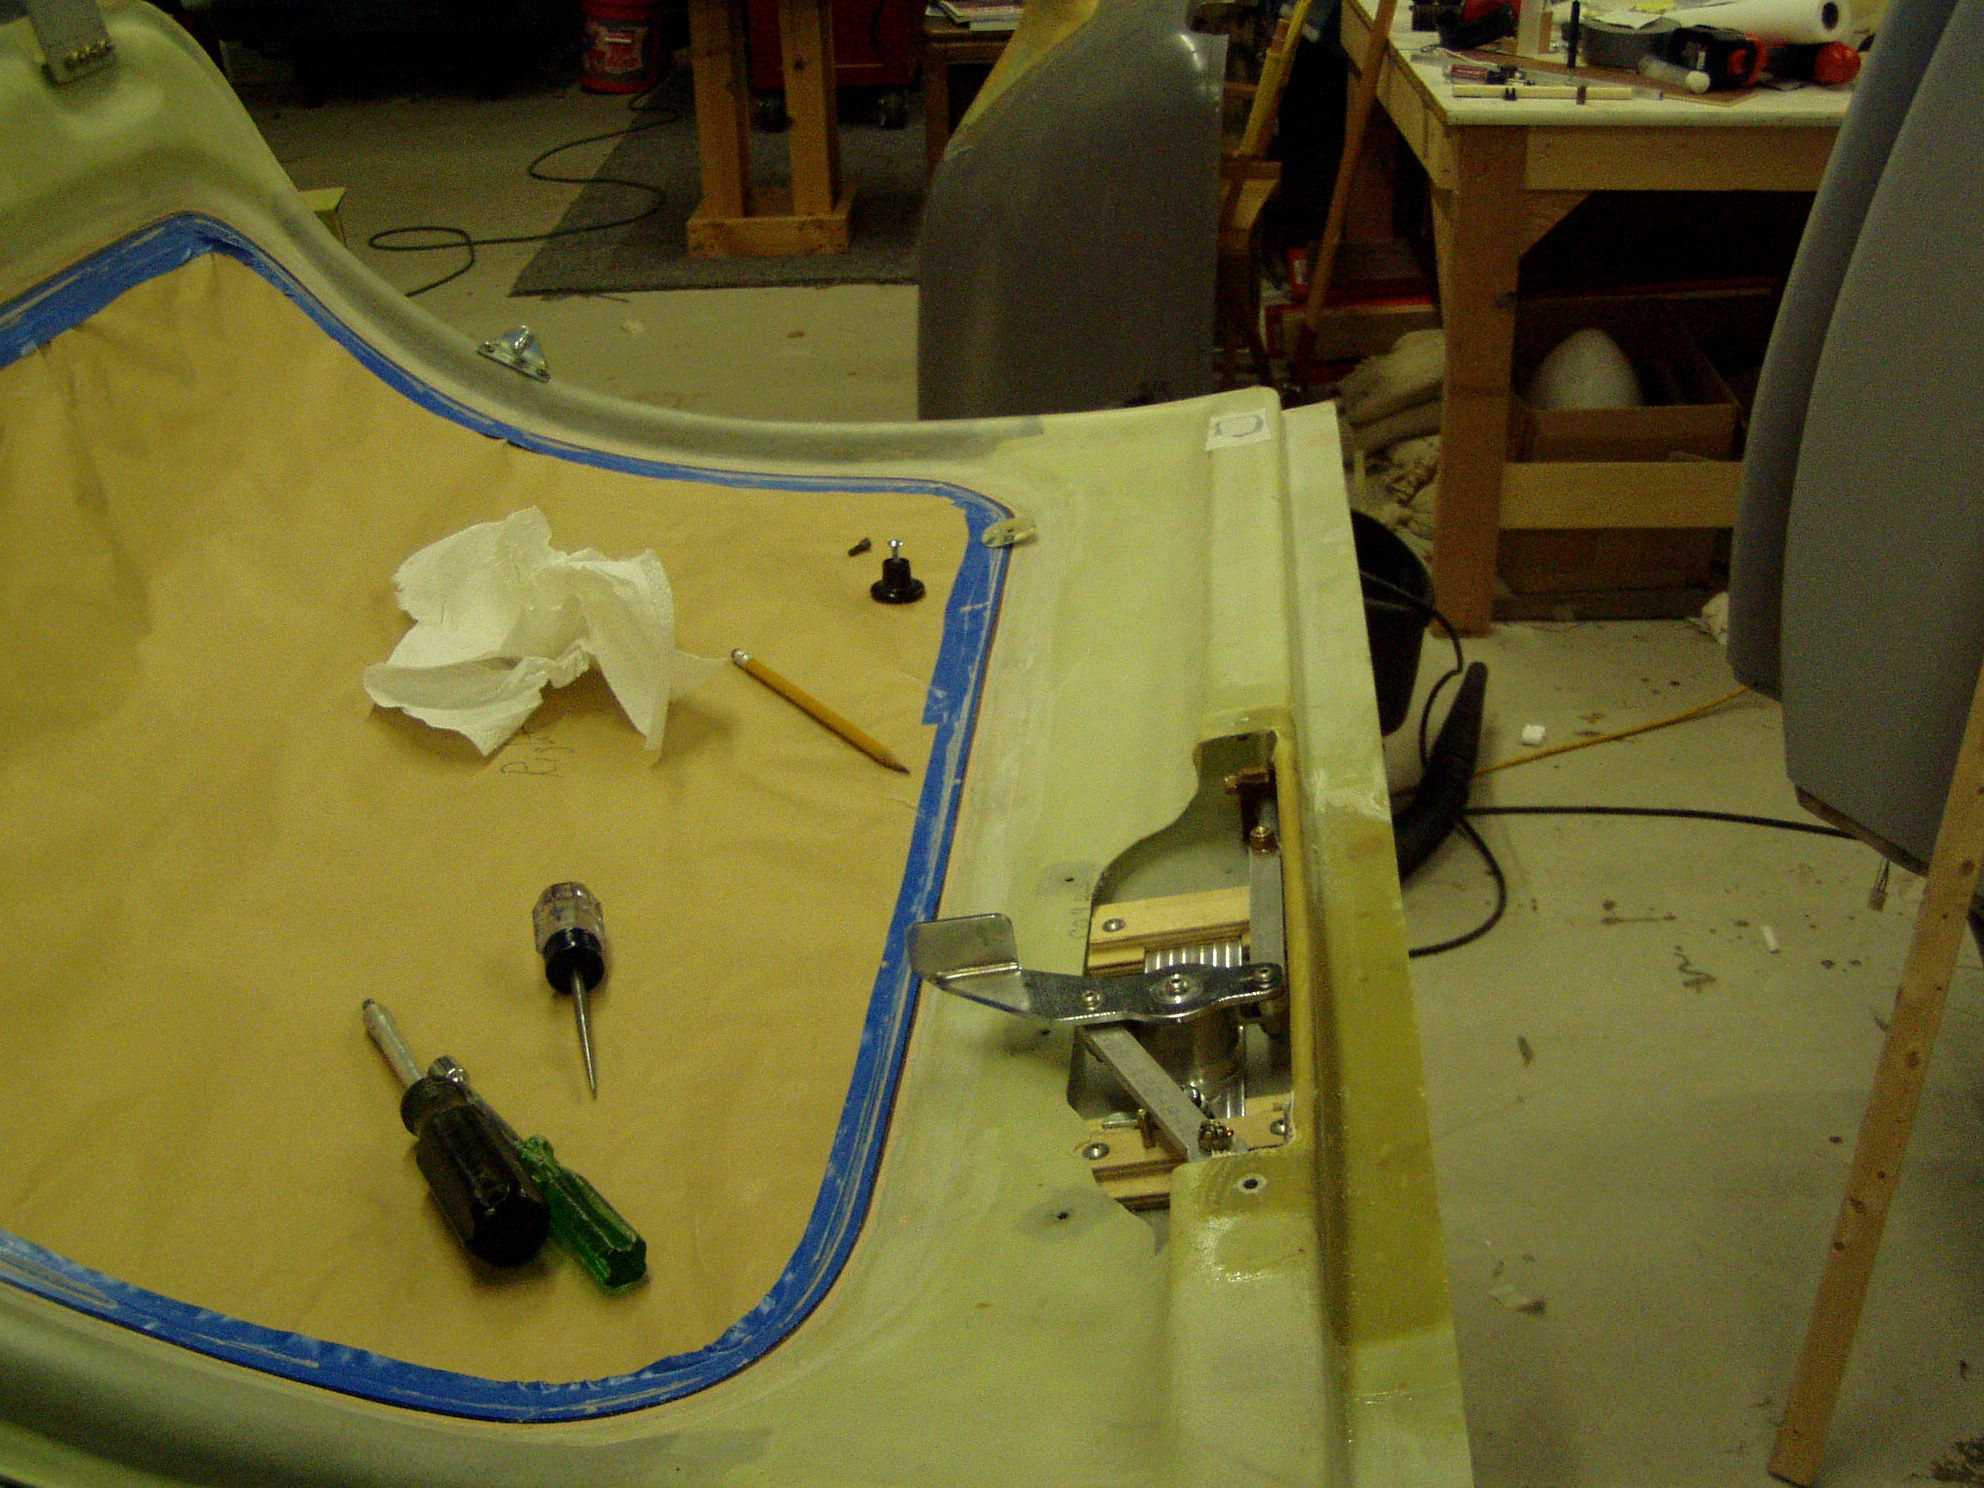
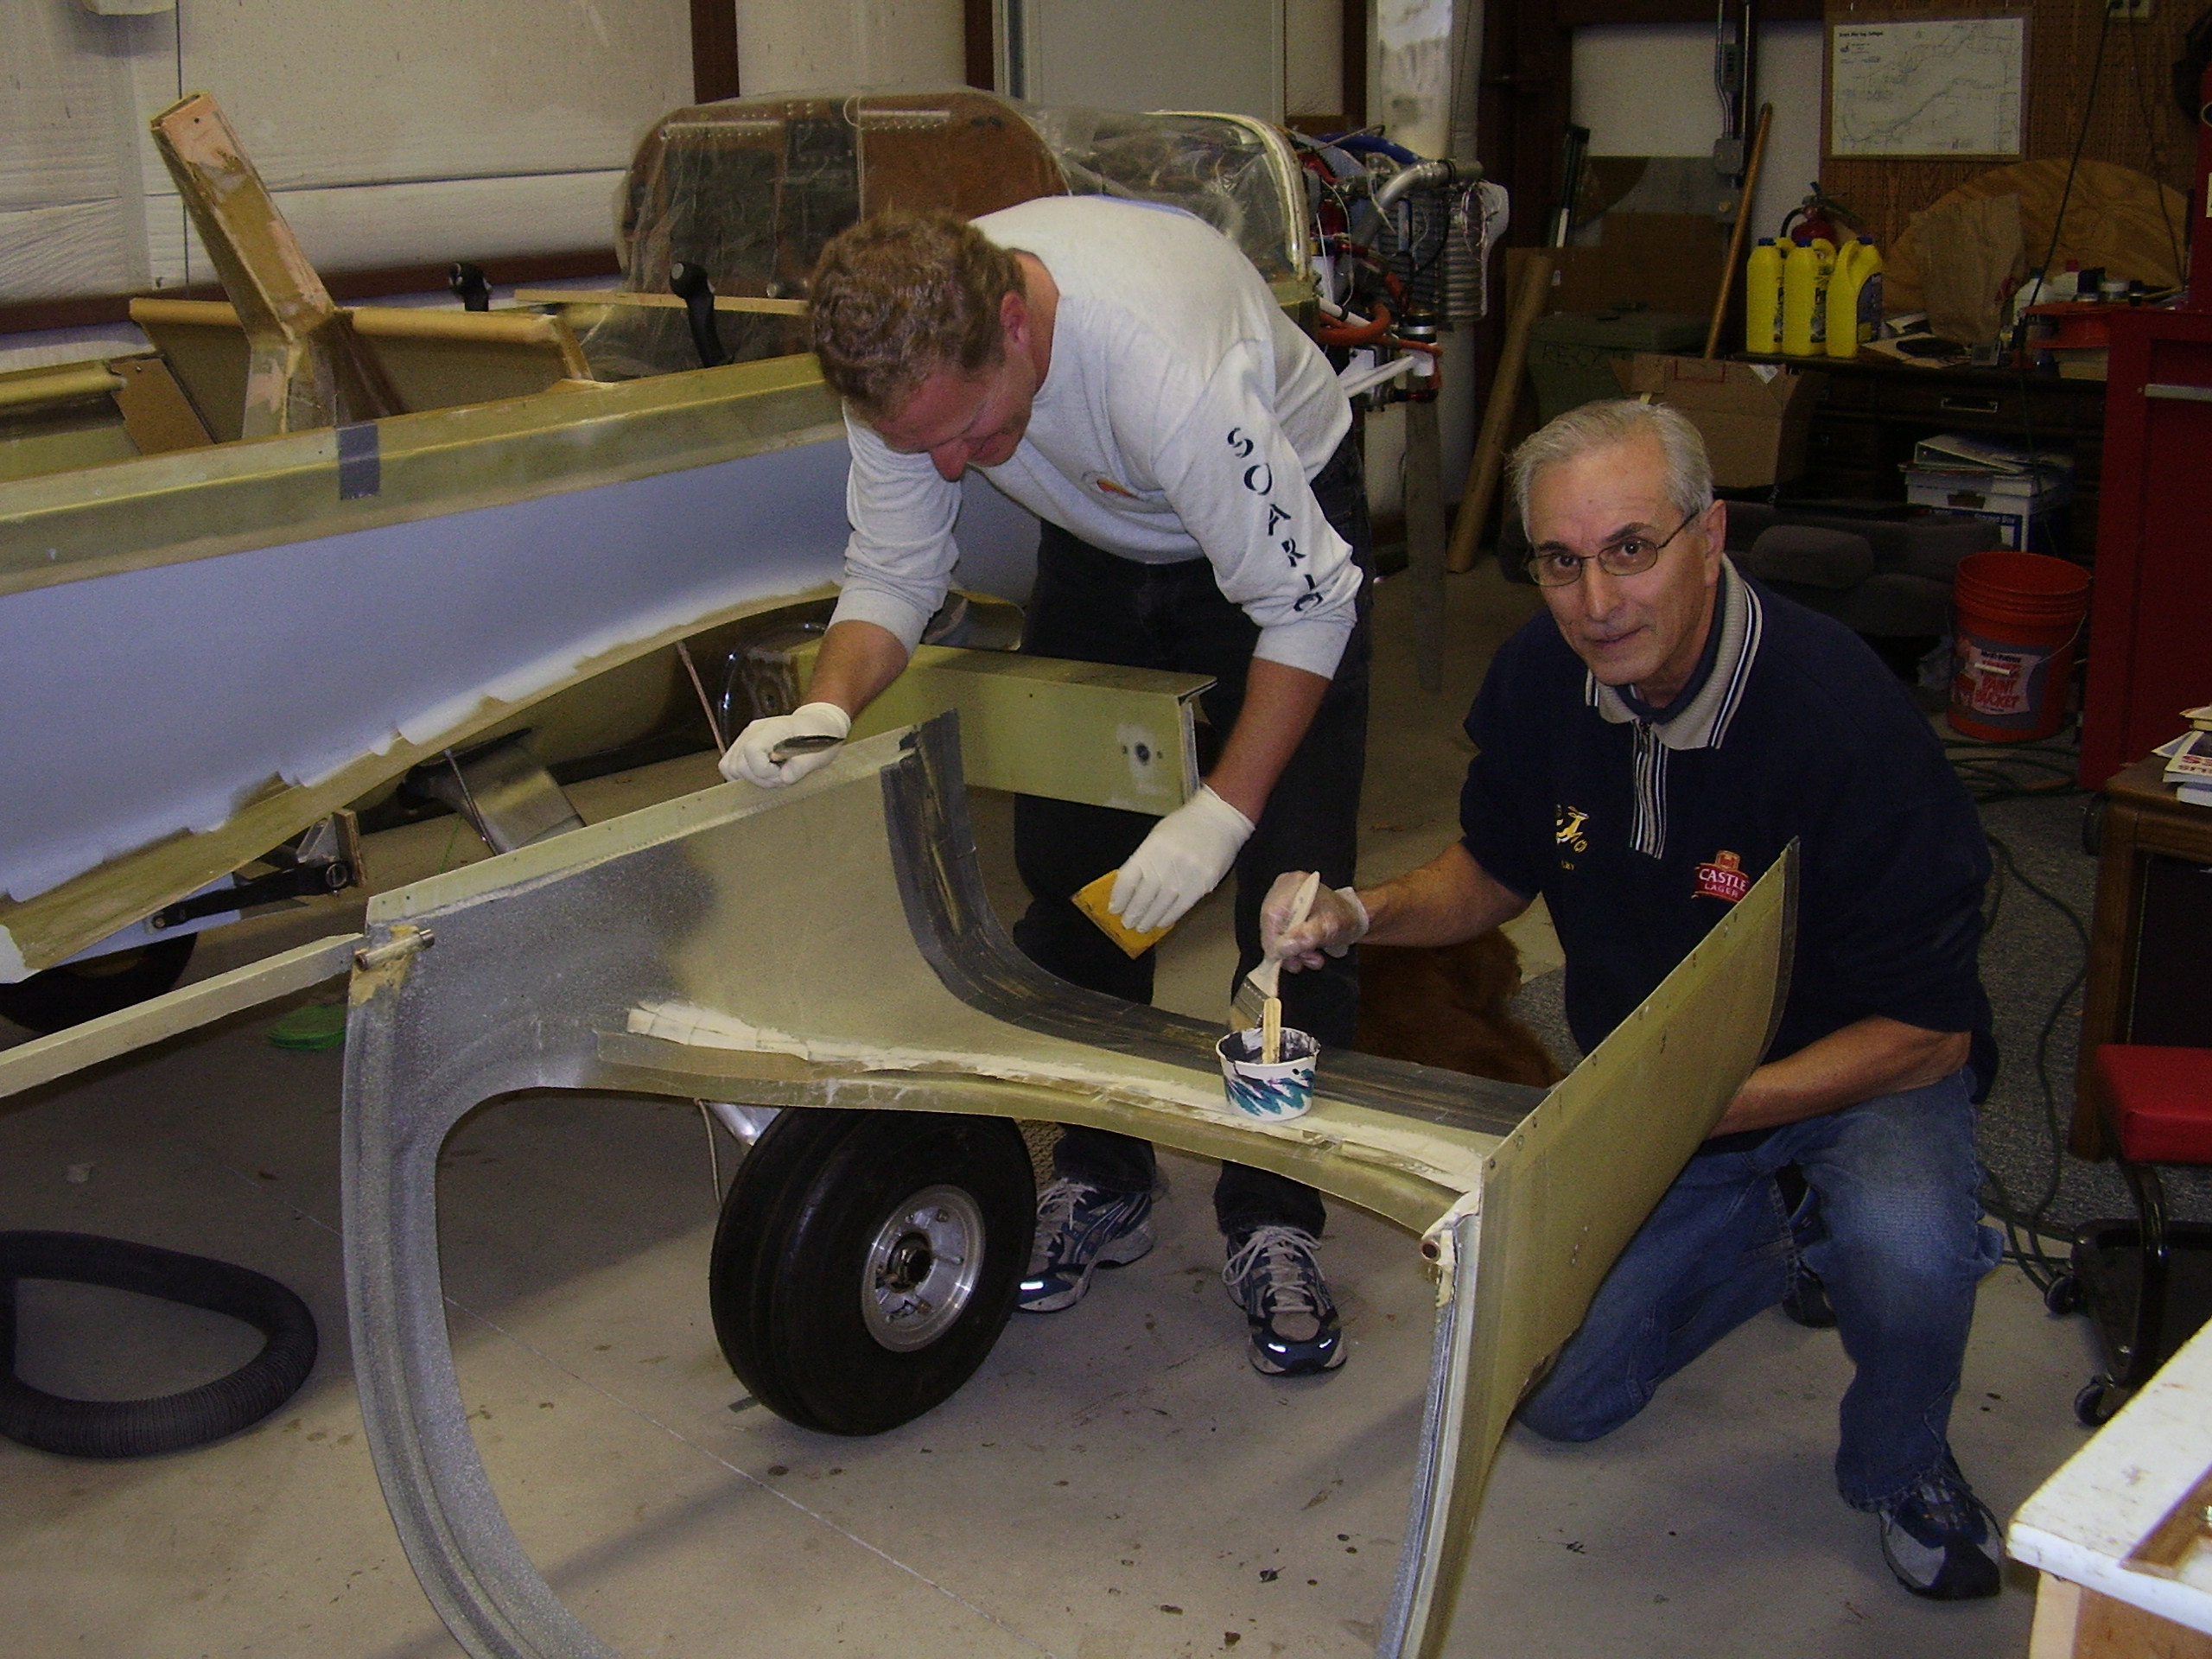
After looking at my Lyle Locks installation prior to final installation of the doors, and talking with Dave Tate about the installation technique, I decided that some reinforcement of the lower edge of the door was in order. I therefore added a 1/4" of foam to the cutout area, and covered it with 2 layers of BID. This returned a lot of stiffness to the door panel.
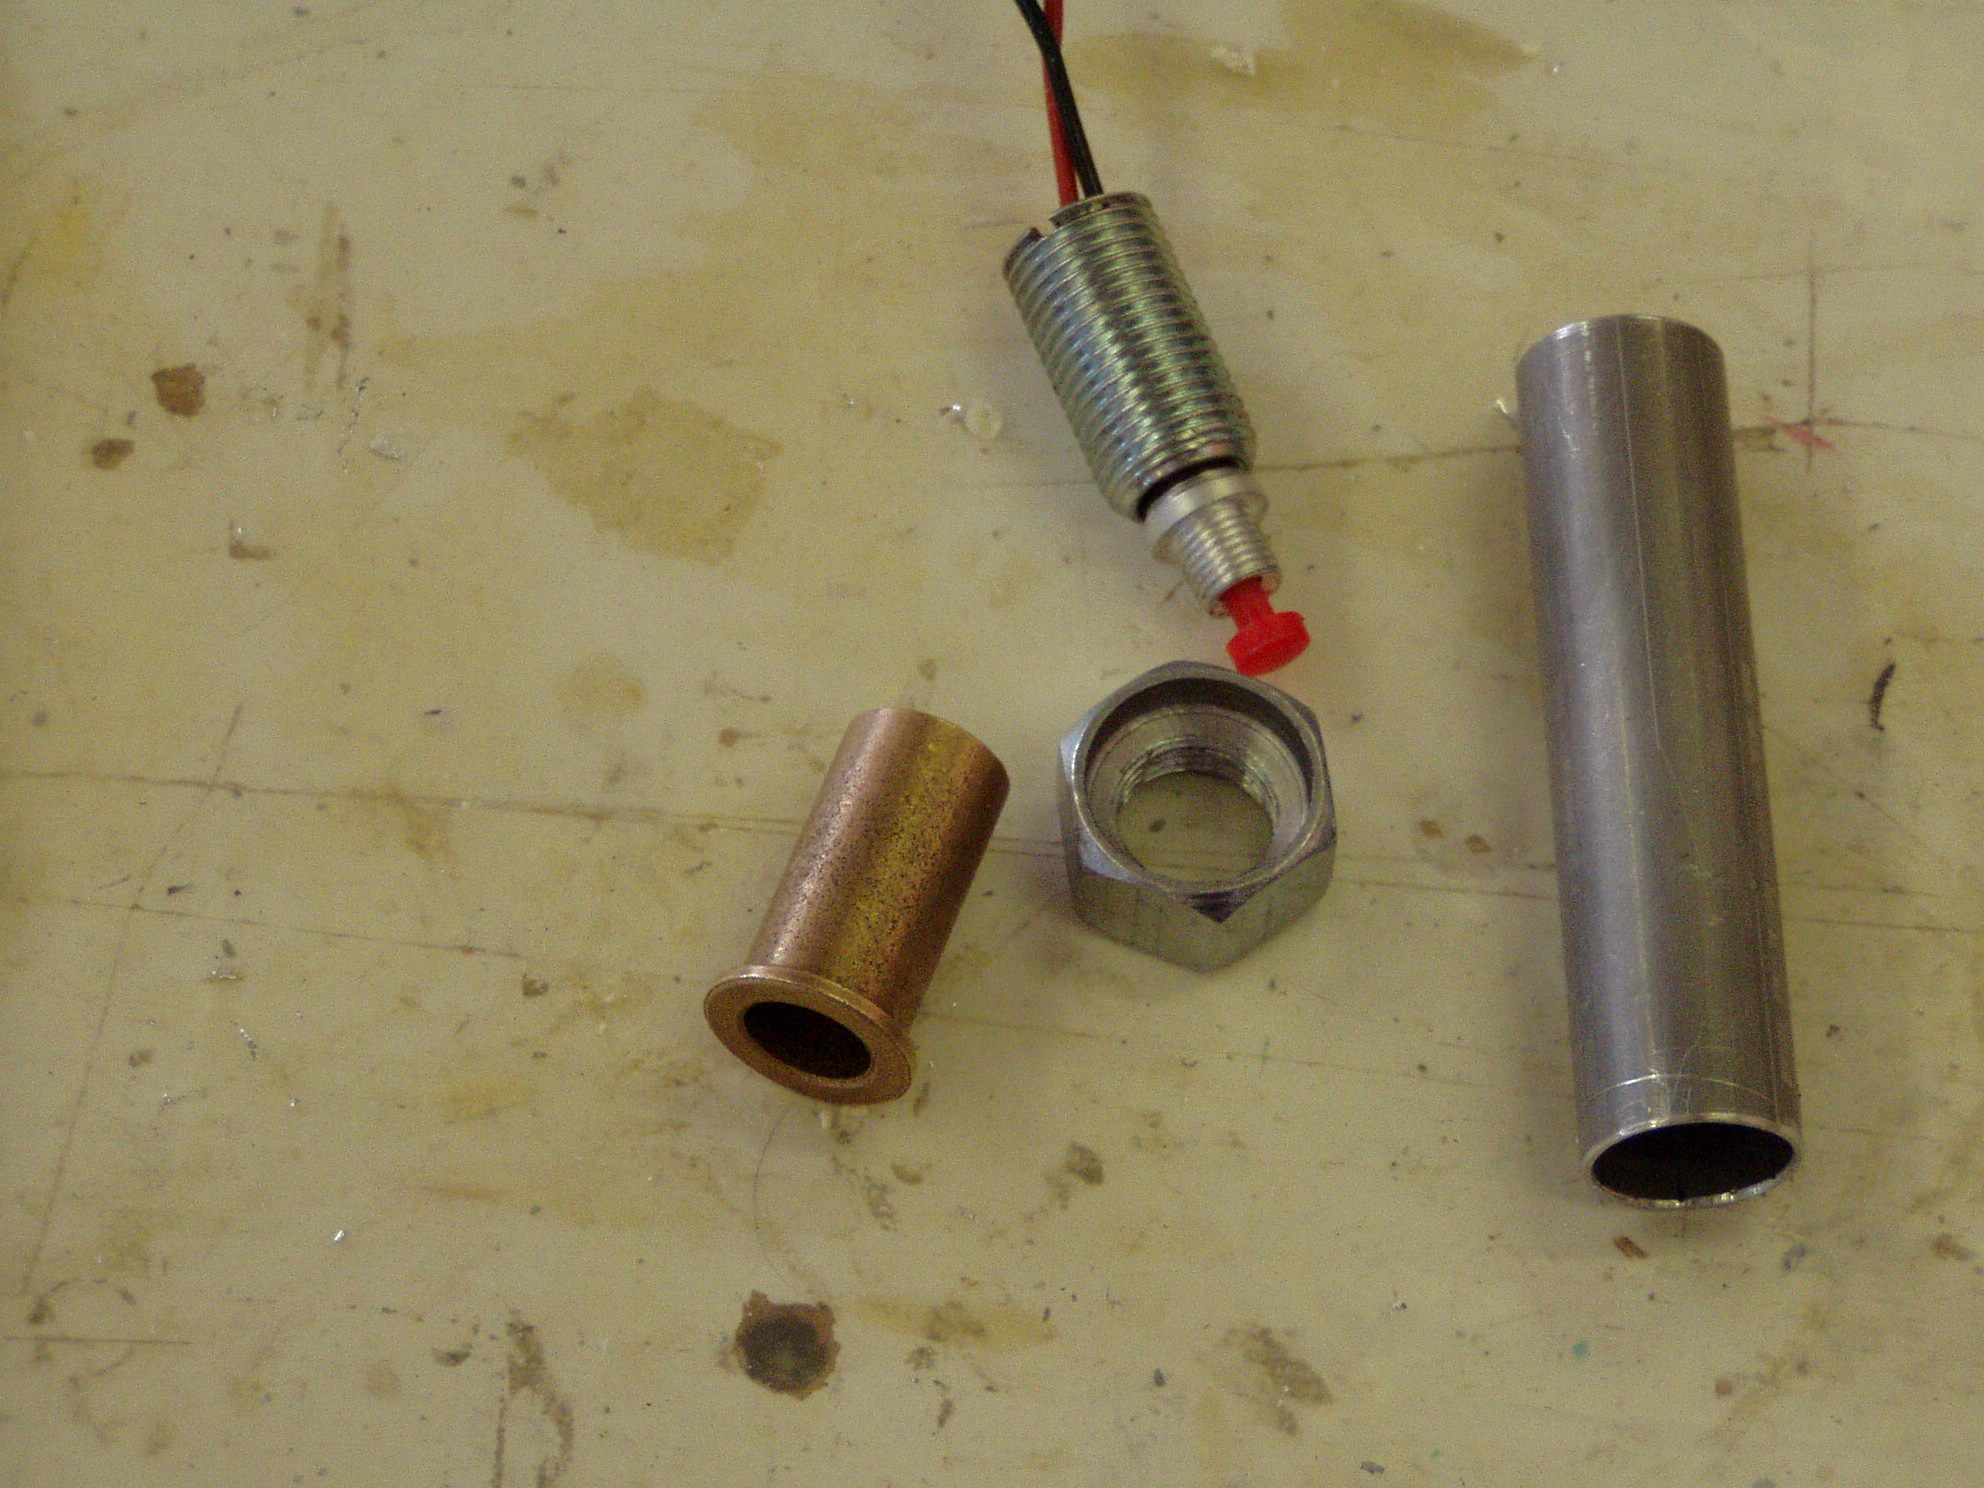
I have also listened carefully to all the stories of doors coming off in flight. The "Lyle Locks" provide very positive locking 'if the pins engage the door jamb properly'. I wanted to make sure that my doors are closed, so I have an array of 4 LED's that glow red if any of the pins are not fully engaged. To make the switches/receptacles for the door pins, I used a Bronze bushing, some aluminum tubing, and a 1/2x20 nut and threaded rod.
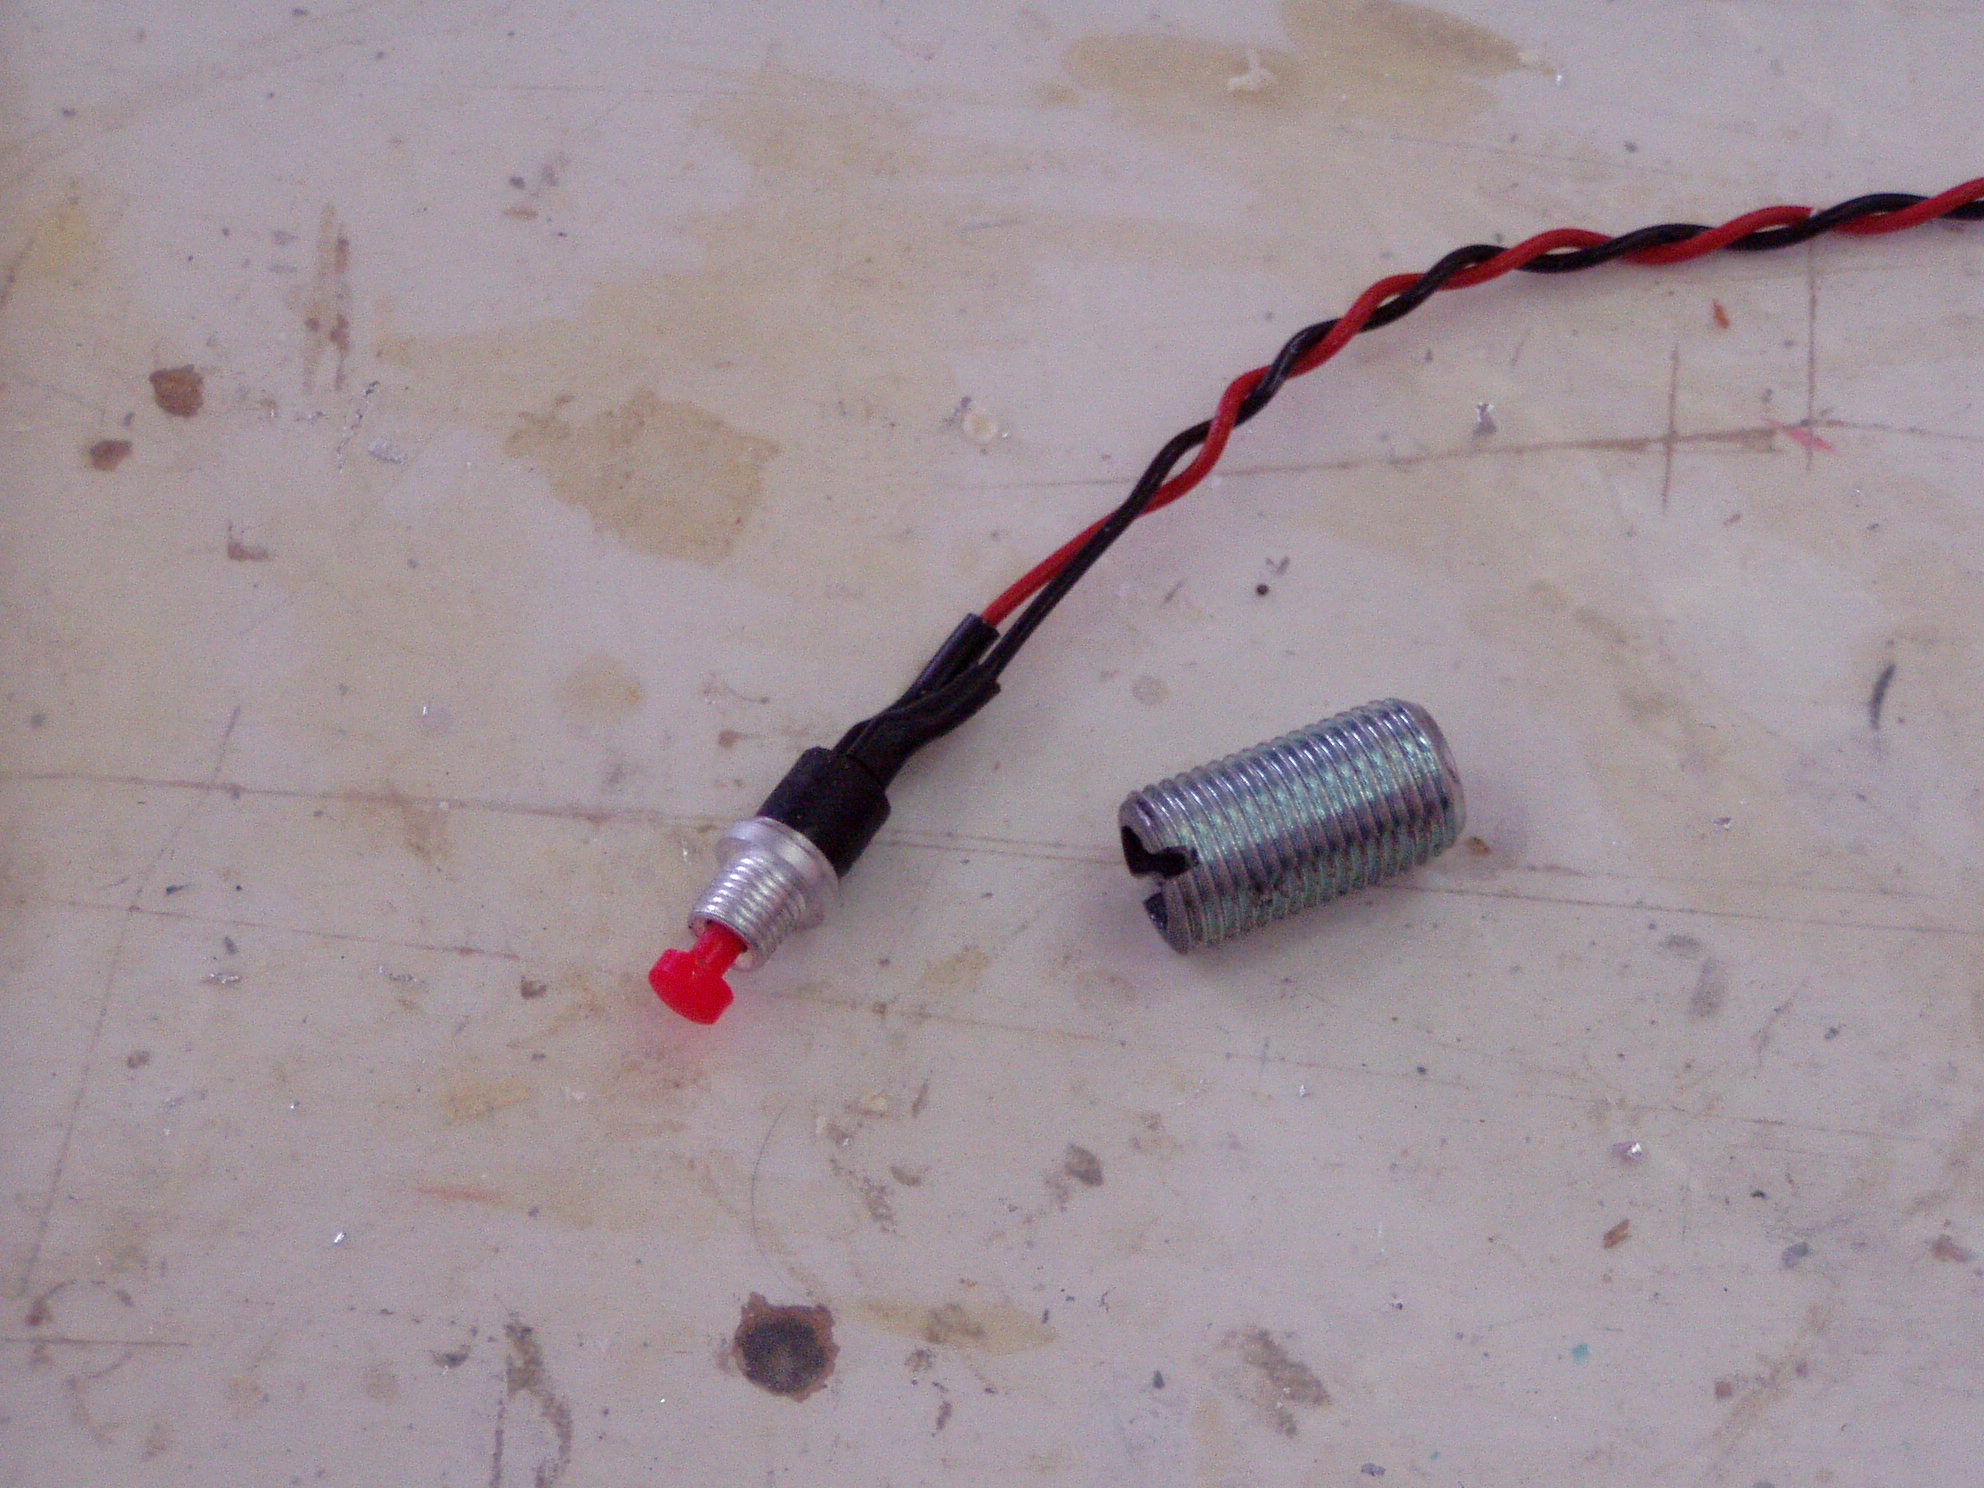
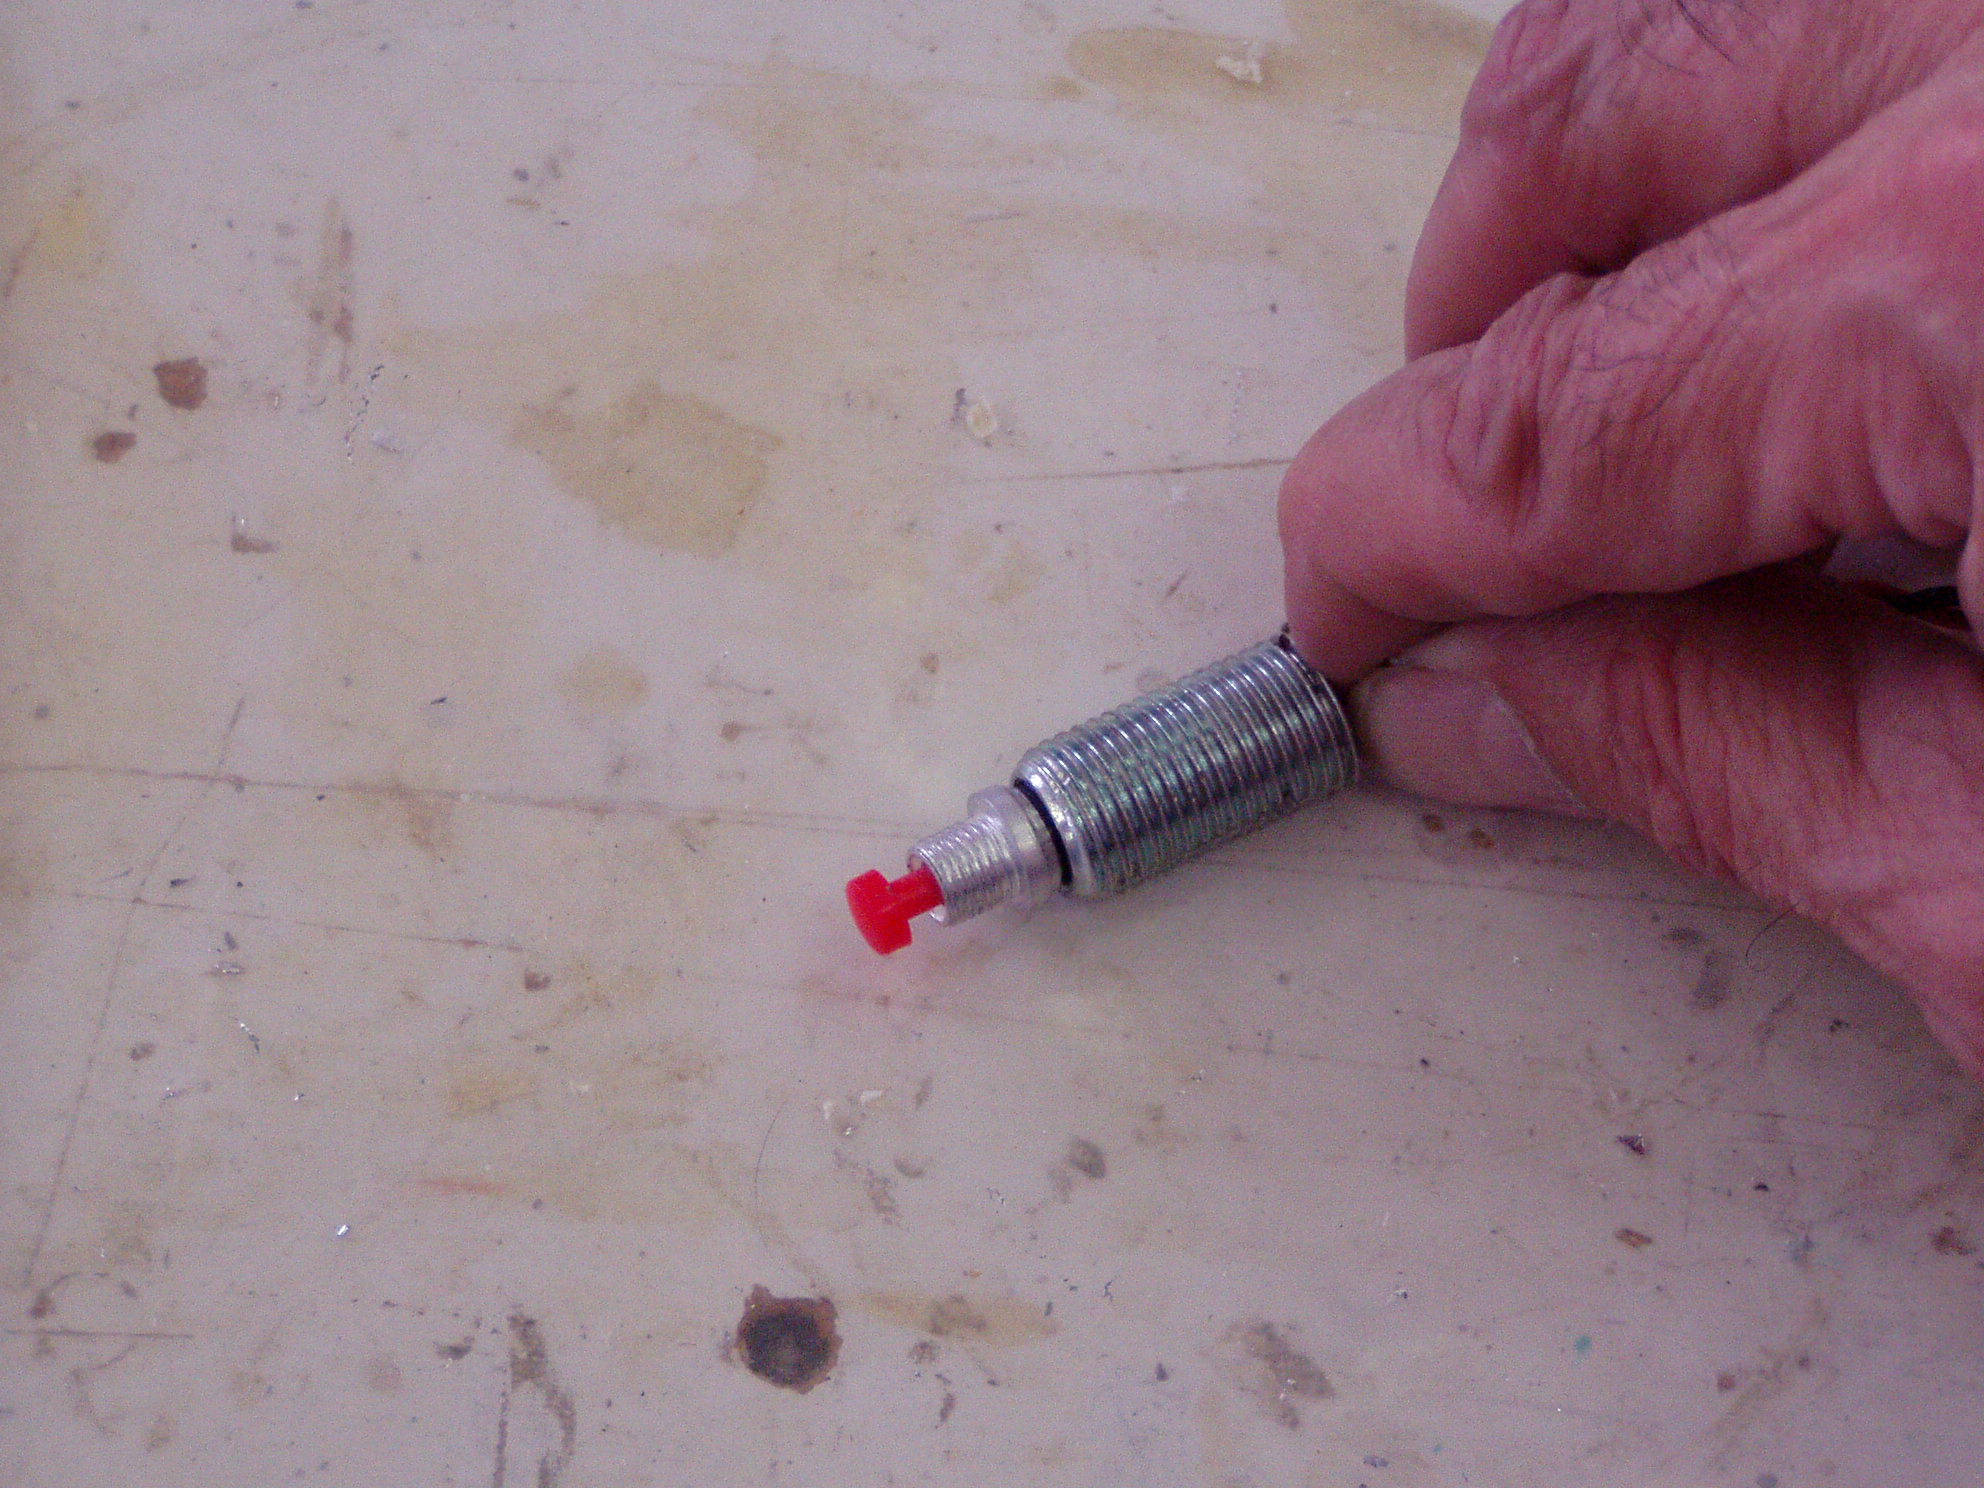
Shows the threaded rod, and a small Normally Closed switch that I obtained from Radio shack. I drilled out the threaded rod to accept the switch, and bonded it into the rod with flox after attaching leads.
I then cut a short length of Aluminum tubing, Drilled out a recess in a 1/2 x 20 nut, used JB-weld to bond the bronze bushing into the tubing and the tubing into the nut. You can see all the pieces in the photo
After the assembly cured, I chucked it in a lathe and turned off the edges of the nut to make it be circular (less visible), and then bonded it to the top shell of the fuselage while the top shell was temporarily mounted in place. Positioning the door in the fully closed position, I extended the locking pins, slid the assembly over the pins, and then Floxed it into place. You can see the door jamb receptacles in photo
which is a picture during the bonding of the top into place. The tubes are at the door sill area. I have since added a small set-screw to the units to hold the switch in position after adjustment.
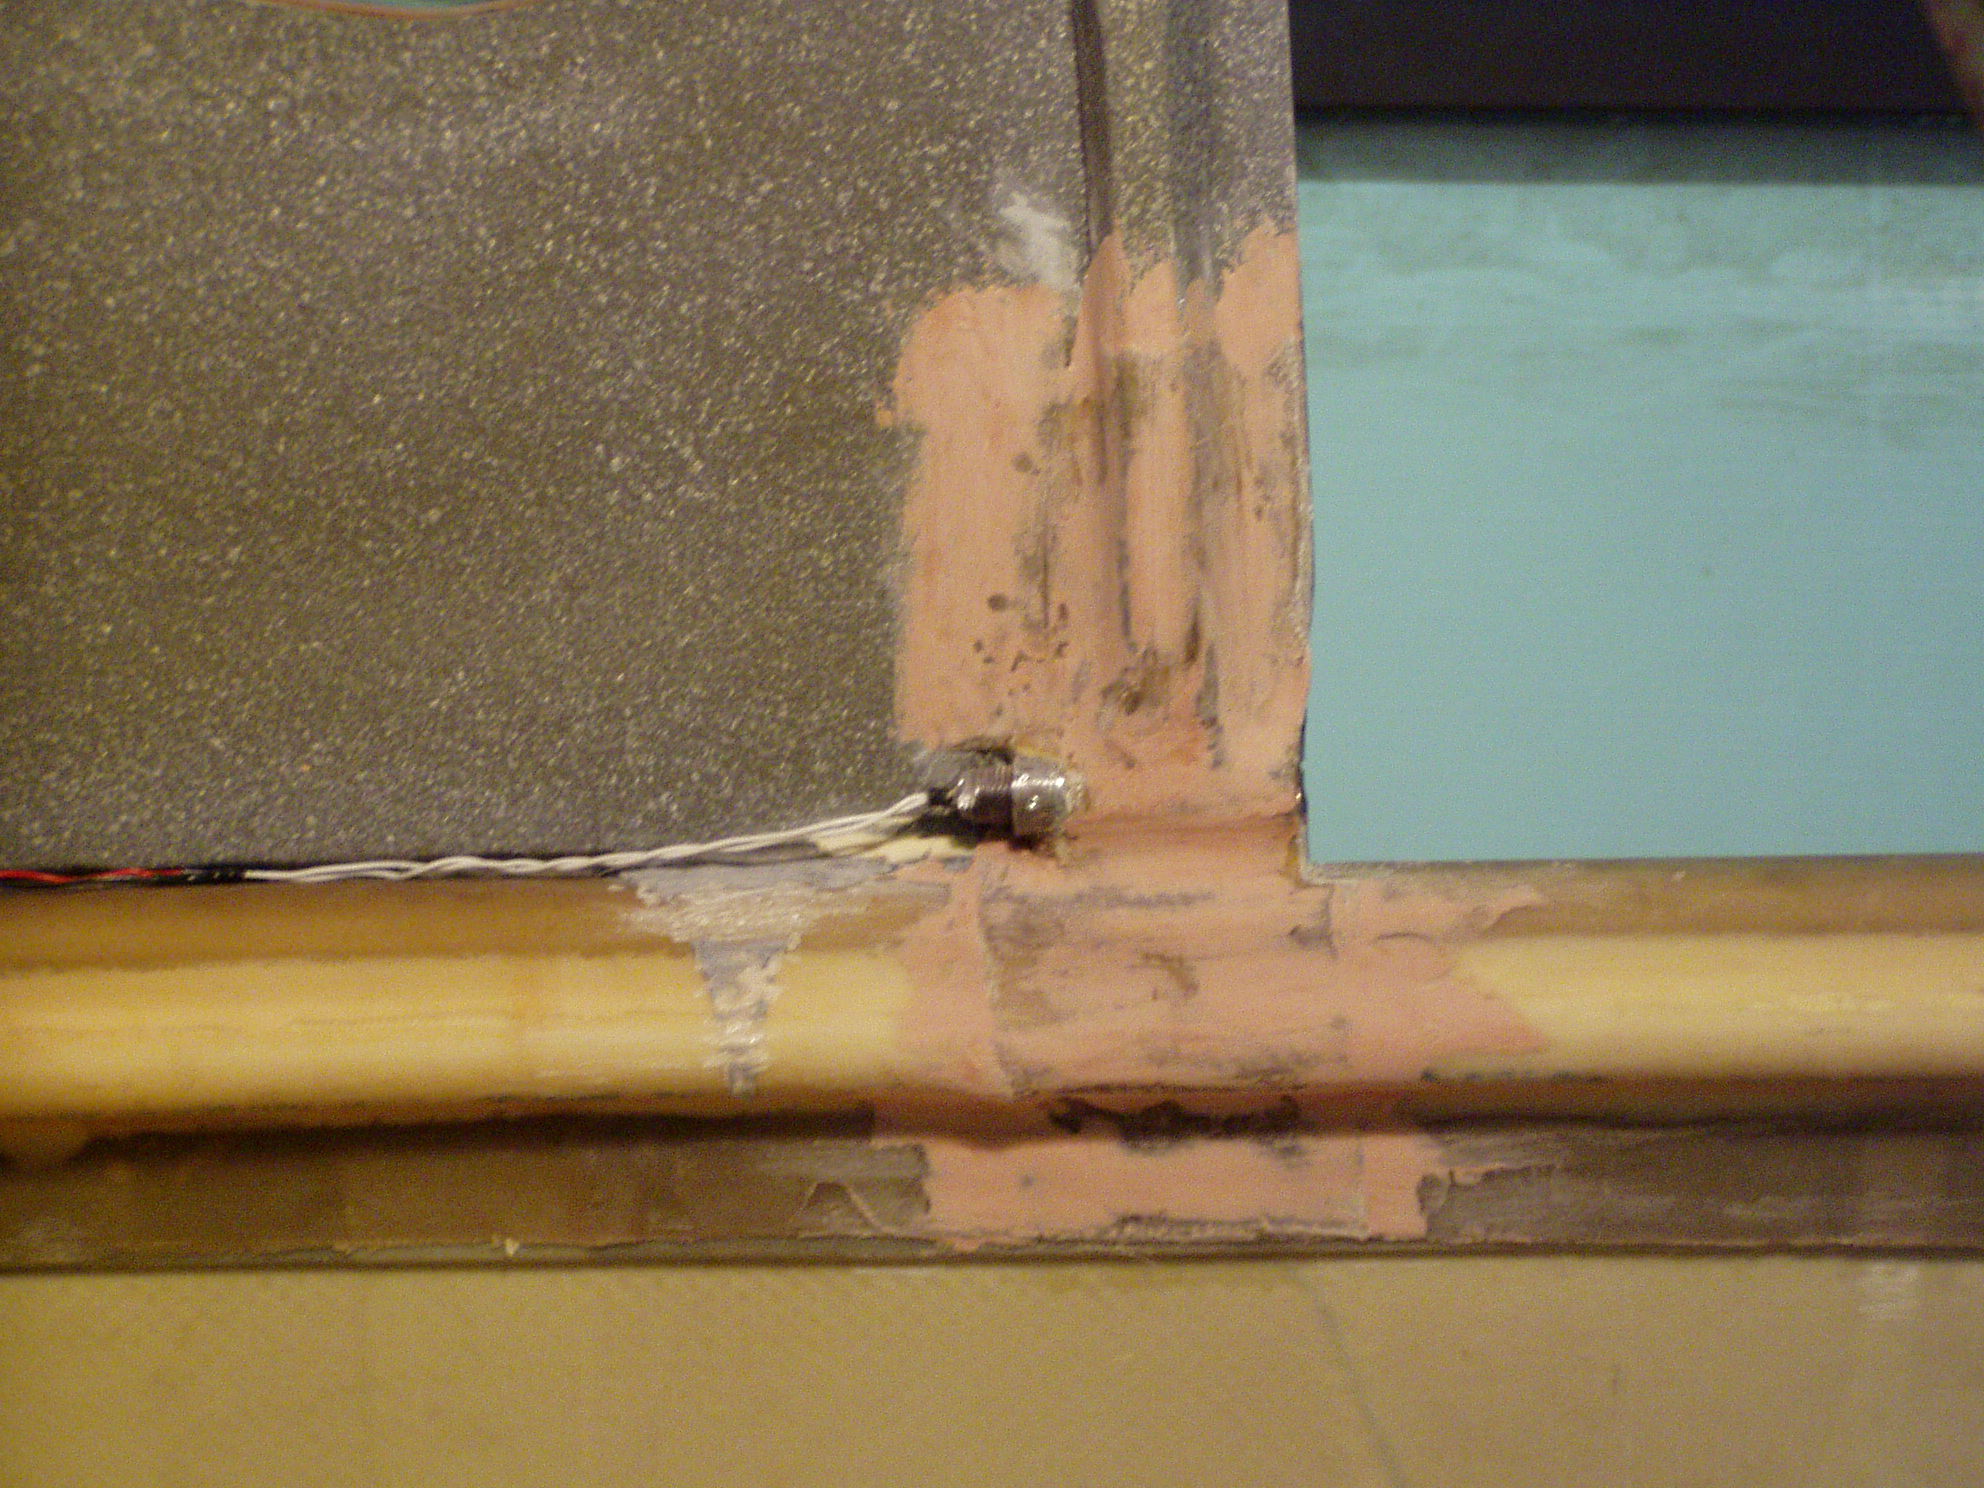
is a picture after the top was bonded in place and I have begun filling the area around the tube with Aeropoxy light. It gets covered with fiberglass and then painted to match the interior.
Bill Schertz
KIS Cruiser #4045
N343BS (reserved)